2.33C Acid–Alkali Titration
An acid–alkali titration is used to determine the concentration of an acid or an alkali.
It involves carefully measuring the volume of one solution required to neutralise a known volume of another solution.
Principle of Titration
\( \mathrm{Acid + Alkali \rightarrow Salt + Water} \)
Neutralisation occurs when:
\( \mathrm{H^+(aq) + OH^-(aq) \rightarrow H_2O(l)} \)
The end-point is when exactly enough acid has been added to react with all the alkali (or vice versa).
Apparatus Used
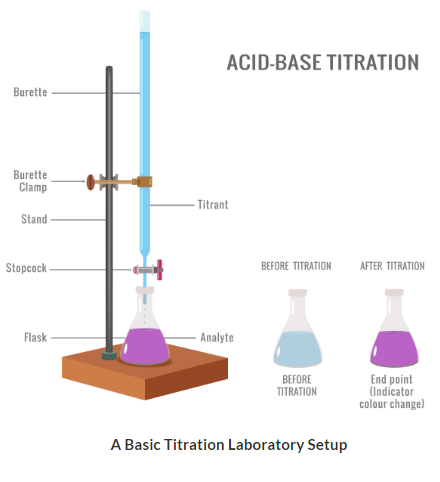
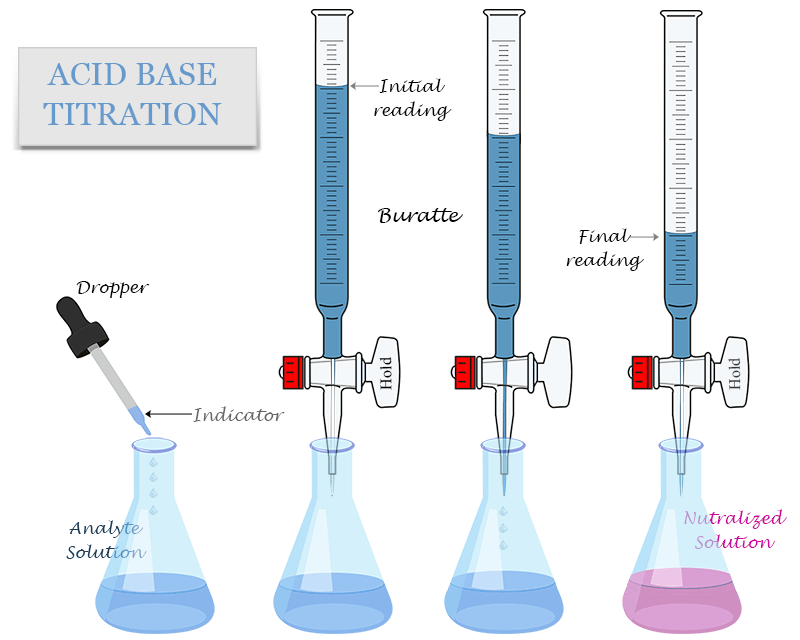
- Burette (for accurate volume measurement)
- Pipette (to measure fixed volume of solution)
- Conical flask
- White tile (to see colour change clearly)
- Indicator (e.g. phenolphthalein or methyl orange)
Method
- Rinse the burette with the solution to be placed inside it.
- Fill the burette with the acid (or alkali) and record the initial volume.
- Use a pipette to transfer a measured volume of the other solution into a conical flask.
- Add a few drops of suitable indicator.
- Place the flask under the burette.
- Slowly add solution from the burette while swirling the flask.
- Stop adding when the indicator just changes colour permanently.
- Record the final burette reading.
- Calculate the volume added (final reading − initial reading).
- Repeat to obtain concordant results.
Choice of Indicator
- Phenolphthalein: colourless in acid, pink in alkali.
- Methyl orange: red in acid, yellow in alkali.
The correct indicator depends on the acid–alkali combination.
Accuracy Tips
- Read the bottom of the meniscus at eye level.
- Add solution drop by drop near the end-point.
- Repeat until two concordant results (within 0.1 cm³).
Example 1 (Conceptual):
Why is the conical flask placed on a white tile?
▶️ Answer/Explanation
To see the colour change of the indicator clearly.
The white background makes the end-point easier to observe.
Example 2 (Application):
The initial burette reading is 2.30 cm³ and the final reading is 27.80 cm³. Calculate the volume added.
▶️ Answer/Explanation
\( \mathrm{Volume = 27.80 – 2.30 = 25.50\ cm^3} \)
Example 3 (Hard):
Describe fully how you would carry out an acid–alkali titration to obtain accurate results.
▶️ Answer/Explanation
Rinse the burette with the solution it will contain.
Fill the burette and record the initial reading at eye level.
Use a pipette to measure a fixed volume of the other solution into a conical flask.
Add a few drops of indicator.
Place the flask under the burette on a white tile.
Add solution slowly while swirling continuously.
Near the end-point, add drop by drop.
Stop when the indicator just changes colour permanently.
Record the final reading.
Repeat the titration until concordant results are obtained.